
 Being that WordPress is the largest and most popular content management system (CMS), it should come as little-to-no surprise that it’s the preferred platform among seasoned bloggers. It’s fast, efficient, supports the use of multiple authors, and it’s search engine friendly. But many bloggers make the mistake of using the hosted version found at WordPress.com. If your blog is currently using hosted WordPress, you should consider moving it to your own server by following the steps outlined below.
Why Self-Hosted WordPress is Better
While there are advantages and disadvantages associated with both hosted WordPress and self-hosted WordPress, the self-hosted version generally offers more versatility. It provides users with full access to their files, meaning you can make changes that would otherwise not be possible with hosted WordPress. Using a file transfer protocol (FTP) program like CuteFTP or FileZilla, you can connect directly to your respective web host to download, upload or edit your website’s files — a feature that’s not available in hosted WordPress.
Self-hosted WordPress also offers significantly more themes and plugins. You’ll have access to ten of thousands of themes and plugins, whereas hosted WordPress restricts users to just a couple hundred. This alone is reason enough to choose self-hosted WordPress over hosted.
How To Transition To Self-Hosted WordPress
If you’re looking to transition a hosted WordPress blog to self-hosted, you’ll need to sign up for a web hosting service. One of the few perks associated with the hosted version lies in its namesake — it’s hosted by WordPress. With self-hosted, you’ll have to sign up for a web hosting service. Don’t worry about choosing the most expensive or “best” type of web hosting, as basic shared hosting should suffice. You can always upgrade your hosting later if needed.
You’ll also need a domain name, which can be purchased through any domain registrar like GoDaddy or NameCheap. Most Internet marketers agree that .coms are the best way to go, but has stated time and time again that it doesn’t factor domain extensions into its ranking algorithm, meaning a .net or .info should rank just as well as a .com.
Steps To Transition:
- Sign into your WordPress.com account and choose the blog that you wish to transition to self-hosted.
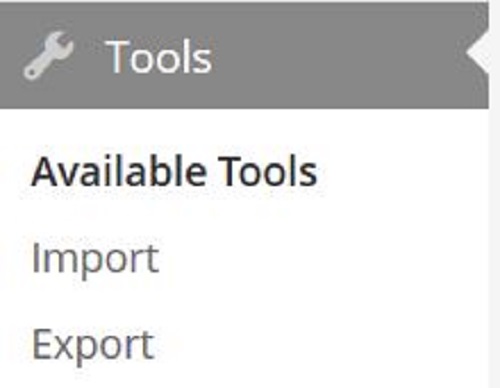
- In the WordPress dashboard, access Tools > Export.
- You will then see two different options: “Guided transfers” and “export.” Choose the export (free) option, at which point you blog’s data will be saved to an XML file stored on your computer.
- Next, go ahead and install a clean version of WordPress on your new domain name and web host. You can refer to this document for further instructions.
- From your new site’s WordPress dashboard, choose Tools > Import > WordPress.
- Congratulations, you’ve just transitioned your blog from hosted to self-hosted!
You may have to do some tweaking, such as adding your blogroll links back (optional), but the bulk of your blog should be largely the same as before.
Did this tutorial for you? Let us know in the comments section below!
Good tutorial – worked for me. Thank you.
Thanks! I’ve bookmarked for when I’m ready to make the transition.
Self hosted is the way to go. I love the extra themes and plugins.